Landscape photography allows us to capture the breathtaking beauty of the natural world. From majestic mountains to serene seascapes, this genre offers endless opportunities for creativity. However, capturing truly impactful landscape images requires more than just pointing your camera at a beautiful scene.
Planning Shoots Around Golden Hour
The quality of light can make or break a landscape photograph. While you can capture beautiful landscapes at any time of day, the golden hours—shortly after sunrise and before sunset—provide the most magical light for landscape photography.
During these periods, the sun is low in the sky, creating warm, directional light that adds depth, texture, and dimension to the landscape. The long shadows enhance the topography of the land, while the warm color temperature infuses the scene with a captivating glow.
To make the most of golden hour:
- Research your location in advance and identify the best vantage points
- Arrive at least 30 minutes before golden hour begins to set up your equipment
- Use apps like PhotoPills or The Photographer's Ephemeris to predict exactly where the sun will rise or set
- Don't pack up immediately after sunset—the "blue hour" that follows often offers equally stunning opportunities with its cool, ethereal tones

The warm, directional light of golden hour enhances texture and depth in landscape photographs
Mastering Composition with Foreground Elements
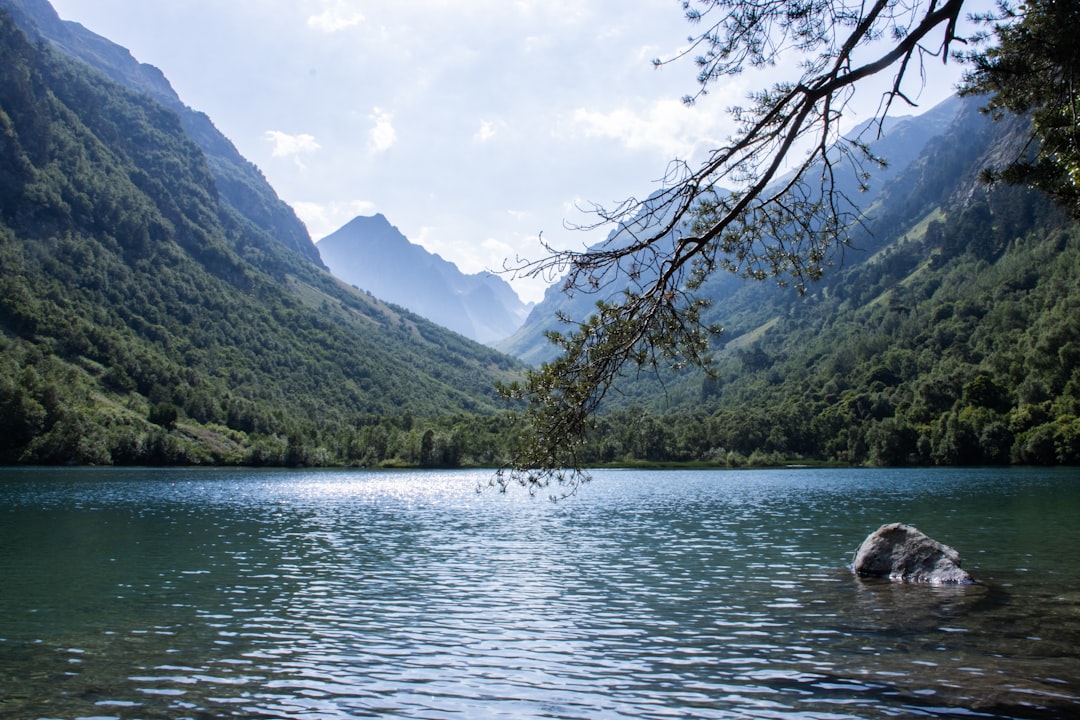
Strong composition transforms a simple snapshot into a compelling photograph. In landscape photography, including interesting foreground elements is one of the most effective ways to create depth and draw viewers into your image.
Foreground elements serve multiple purposes:
- They create a sense of depth by establishing layers in your composition
- They provide a point of interest that leads the viewer's eye into the scene
- They add scale, helping viewers understand the grandeur of the landscape
- They can frame the primary subject, directing attention where you want it
Look for interesting rocks, patterns in the sand, flowers, logs, or other elements that can serve as foreground interest. Position yourself to include these elements in the bottom portion of your frame, creating a visual pathway into the scene.
When incorporating foreground elements, use a small aperture (high f-number) to maintain sharpness throughout the image. Typically, an aperture between f/11 and f/16 works well for maximum depth of field in landscape photography.
Long Exposure Techniques for Water and Clouds
Long exposure photography allows you to capture the passage of time, creating ethereal effects with moving elements like water and clouds. This technique can transform ordinary scenes into dreamlike landscapes.
For water, long exposures create a silky, smooth effect that conveys a sense of tranquility. Exposure times between 1 and 30 seconds can produce beautiful results, depending on the water's movement speed and the effect you're trying to achieve.
For clouds, longer exposures (typically 30 seconds to several minutes) capture their movement across the sky, creating dramatic streaking effects that add dynamism to your compositions.
Essential equipment for long exposure landscape photography includes:
- A sturdy tripod to eliminate camera shake during long exposures
- Neutral density (ND) filters to reduce light entering the lens, allowing for longer exposures even in bright conditions
- A remote shutter release to prevent camera movement when triggering the shutter
- An intervalometer for exposures longer than 30 seconds (if your camera doesn't have a built-in bulb mode timer)

Long exposure technique creating smooth, silky water effect at sunset
Essential Filters for Landscape Photography
While many effects can be created in post-processing, certain filters remain invaluable tools for landscape photographers:
Neutral Density (ND) Filters
These reduce the amount of light entering your lens without affecting color, allowing you to use longer exposures or wider apertures in bright conditions. They come in various strengths, measured in stops of light reduction:
- 3-stop ND: Useful for slightly extending exposure in bright conditions
- 6-stop ND: Good for moderate long exposures during daylight
- 10-stop ND: Creates extreme long exposures even in full daylight
Graduated Neutral Density (GND) Filters
These filters are dark on top and gradually transition to clear at the bottom. They help balance exposure between a bright sky and darker foreground—a common challenge in landscape photography. They come in several gradation types:
- Soft-edge: Gradual transition, ideal for scenes without a defined horizon
- Hard-edge: Abrupt transition, perfect for scenes with a straight horizon like seascapes
- Reverse: Darkest in the middle, ideal for sunset/sunrise when the horizon is the brightest part
Polarizing Filters
Circular polarizers reduce reflections from non-metallic surfaces and increase color saturation. They're particularly useful for:
- Enhancing blue skies and making clouds pop
- Reducing glare from water surfaces to reveal what's beneath
- Increasing saturation of foliage and other colors
- Cutting through haze for clearer distant subjects
Editing Workflows to Enhance Natural Beauty
Post-processing is an integral part of landscape photography, allowing you to realize your creative vision for the scene. The key is enhancing the natural beauty rather than creating something that looks artificial.
A basic landscape editing workflow might include:
- Global adjustments: Start with lens corrections, then adjust white balance, exposure, contrast, highlights, and shadows to balance the overall image
- Local adjustments: Use graduated and radial filters or adjustment brushes to enhance specific areas of the image
- Color adjustments: Refine the hue, saturation, and luminance of individual colors to create a cohesive color palette
- Sharpening and noise reduction: Apply selective sharpening to enhance texture where needed while reducing noise in smoother areas
- Final touches: Add a subtle vignette to direct attention to the center of the frame, and make any final tweaks to contrast and color
Remember that less is often more in landscape editing. The goal is to enhance what's already there, not to fundamentally change the scene. Let the natural beauty of the landscape speak for itself, with your processing serving to highlight what made you want to capture the scene in the first place.
Conclusion
Landscape photography is as much about patience and preparation as it is about technical skill. The best landscape photographers develop an intimate relationship with the land, often returning to locations multiple times to capture them in perfect conditions.
By understanding light, mastering composition, utilizing the right equipment, and applying thoughtful post-processing, you can create landscape images that not only document beautiful places but evoke the emotions you felt while experiencing them.
Remember that each landscape has its own character and mood. Your job as a photographer is to recognize that essence and find the best way to translate it into a compelling image that resonates with viewers.


Comments (2)
Rebecca J.
June 4, 2023This guide is incredibly comprehensive! I just got my first ND filter and wasn't sure how to use it effectively. The section on long exposures was exactly what I needed. Can't wait to try these techniques this weekend.
Thomas Lee
June 5, 2023I've been struggling with balancing exposure in my landscape shots - the sky always ends up blown out. Going to invest in some GND filters based on your recommendations. Do you have any specific brands you prefer?
Leave a Comment